


Table of Contents
Introduction
Altosio offers a great tool to migrate project management data from and to several vendors. It allows you to seamlessly switch from one software to the other, with a guarantee of no data loss.
The migration software runs in the cloud, so you do not have to worry about installing anything. Everything is accessible from your web browser at https://app.altosio.com
Key Benefits
The migration tool is reliable, secure and lightning fast.
What is migrated?
- Tasks
- Permissions and memberships
- Attachments with their metadata (created by, created at, modified by, modified at)
- Task details including title, collaborators, assignees description, start date, due date, comments
- Completion, labels, covers, and checklists
What to consider?
Asana and ClickUp are quite similar in shape. They almost look exactly the same, with different naming to their entities. Projects in Asana will be translated as Lists in ClickUp. Workspaces will remain as Workspaces. Portfolios in Asana could be translated as Spaces or Folders in ClickUp. Asana sections are translated as ClickUp statuses.
Your end users will not find any issue coping up with the changes as both tools look quite the same, and have almost the same functionalities.
Important Limitations
Migrating into ClickUp is slightly more complicated than other migrations. This is because ClickUp has a few API limitations that do not allow this process to be streamlined and automated from the start to the end. As a result, the migration needs some manual preparation before it can be kicked off. The limitations are outlined below:
- While ClickUp APIs allows the creation of a List, it does not allow creating statuses in it. Therefore, the list has to be created manually along with the statuses. The ClickUp list has to exist in the destination prior to the migration. You have to create it manually in the Space and Folder of your choice.
- ClickUp API does not allow the creation of statuses (Sections in Asana). These sections have to be created beforehand in the ClickUp List.
- ClickUp does not allow more than 1000 subtask tree underneath a main task. If you have a task in Asana that has more than 1000 subtasks, the subtasks will be divided. The main Task will be migrated, and its Level 1 subtasks will be also migrated as Main Tasks, under which the sub-sub...tasks will be correctly migrated.
Security
Enterprise-Grade Security
The Altosio software runs in the Cloud and is hosted in Microsoft Azure data centers located in the US and the EU (Netherlands).
No Data Storage
The Altosio tool does not store anything internally. It reads data in chunks and pushes them in real time to the target. No data is cached or stored in the hard drive of the servers running the migration.
Altosio does however store the unique identifiers of files and tasks that are migrated. This allows the customer to rerun the migration without duplicating data.
Requirements
Asana Requirements
From Asana, you need to connect to your Asana environment using an Asana Personal Access Token (PAT). There is not need for a workspace admin or a privileged user to run the migration. Any Asana user can run the migration. However, to be able to migrate Asana projects, the user issuing the PAT must be a part of the Asana projects that need to be migrated.
ClickUp Requirements
- No need for an admin user or workspace owner.
- A consent to the Altosio ClickUp app to be authorized in your ClickUp environment.
- The Altosio ClickUp app has Read/Write permissions to write data into your ClickUp environment.
Licensing
Each Asana Project migration consumes a Standard Planner migration license. The license is automatically allocated to the Project and will get burnt as soon as the data starts to get migrated to ClickUp. The license could be reused several times on the same Asana Project migration, but will only migrate the incremental changes.
License Details
- • License is board-based (not per user, task, or attachment)
- • Supports delta passes for multiple migration runs
- • Same license used across migration restarts
Configuration
1. Sign up and create your first project
First, create an account at https://app.altosio.com, validate it through the verification email, and then log in.
Once logged in, you’ll land on the home page where you can create your project. Click New Project, give it a meaningful name, and click Create.
2. Create your connectors
a. Create your Asana connector
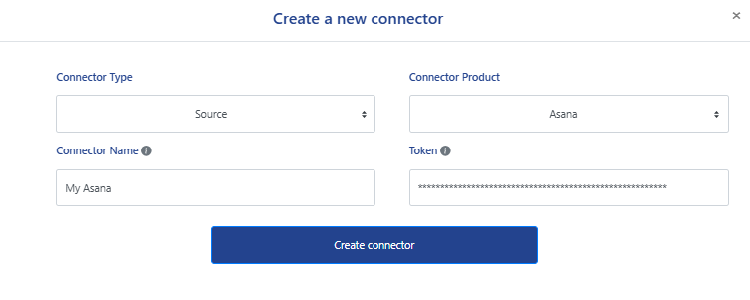
- Click New connector, choose Source, then Asana. Give your connector a meaningful name, then generate your Personal Access Token and paste it in the token field. Click on Create connector to finish the creation process.
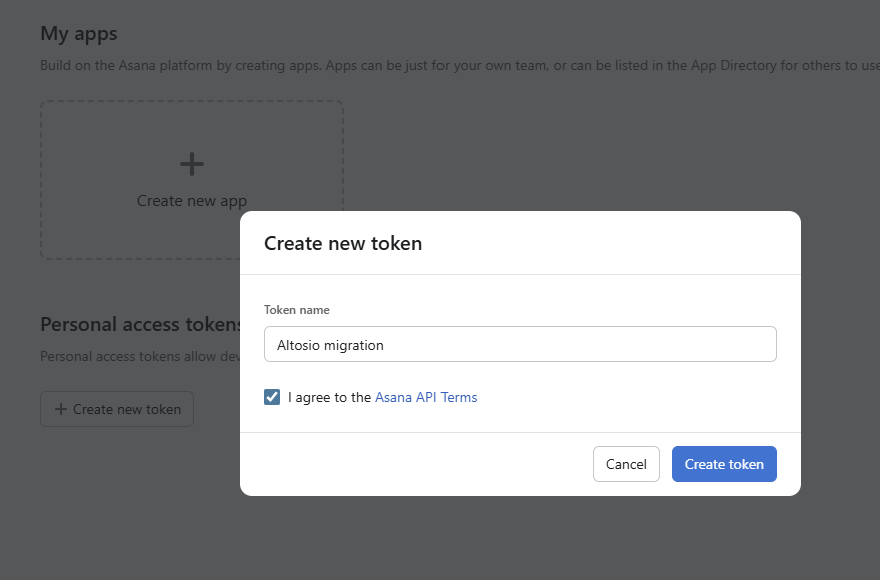
To generate an Asana Personal Access Token, please visit the Asana developer console and follow these steps:
- Scroll down to Personal access tokens and click Generate token.
- Give your token a name and agree to the Asana terms.
- Click Create token.
The creation of an Asana source connector automatically triggers a discovery job of your Asana environment, pulling the list of projects and user mappings. Remember, Altosio will only have access to Asana projects the user issuing the token has access to. If you don't see relevant Asana projects being discovered, it means you user can't access them in Asana.
b. Create your ClickUp connector
-
Click New connector, choose Target, then ClickUp. Click on the Connect to ClickUp button and follow the steps.
Make sure you authorize the workspaces you will be migrating your Asana projects to. Finish the process by clicking Create connector.
Migration
1. User mappings
Before running the migration, visit the Mapping table section of your project. You’ll find your Asana users’ emails prefilled.
If the users in ClickUp are signed up with different email addresses, you will need to fill out the mapping table. Otherwise, you can leave it empty.
With an empty mapping table, the migration would still run, but the list of project memberships and task assignees will not be migrated correctly.
2. Understand the target fields
Target ClickUp List Id
-
This is the unique Identifier of your pre-created ClickUp List.
As mentioned above, ClickUp APIs don't offer a way to create a ClickUp statuses. Therefore, a ClickUp list with the correct statuses has to exist prior to the migration. In this field, you need to provide the Id of the created ClickUp list you're migrating to. You can grab the Id from the URL.
- Navigate to the ClickUp list you created and copy its URL.
- It should look like https://app.clickup.com/9014271850/v/l/li/901402907343
- The highlighted number is your ClickUp list Id. Copy that value and pasted it in this field.
3. Start Migration
Once configured, go to your Planner list page, select the projects you want to migrate, and click Migration Actions -> Start. The board will show a Queued status until processing begins, then switch to Working. Click Details to check logs and statistics.
Post-Migration
Delete your Asana token
- Go to the Asana developer console.
- Go to the Personal Access Token section
- Revoke access by deleting your Personal Access Token.
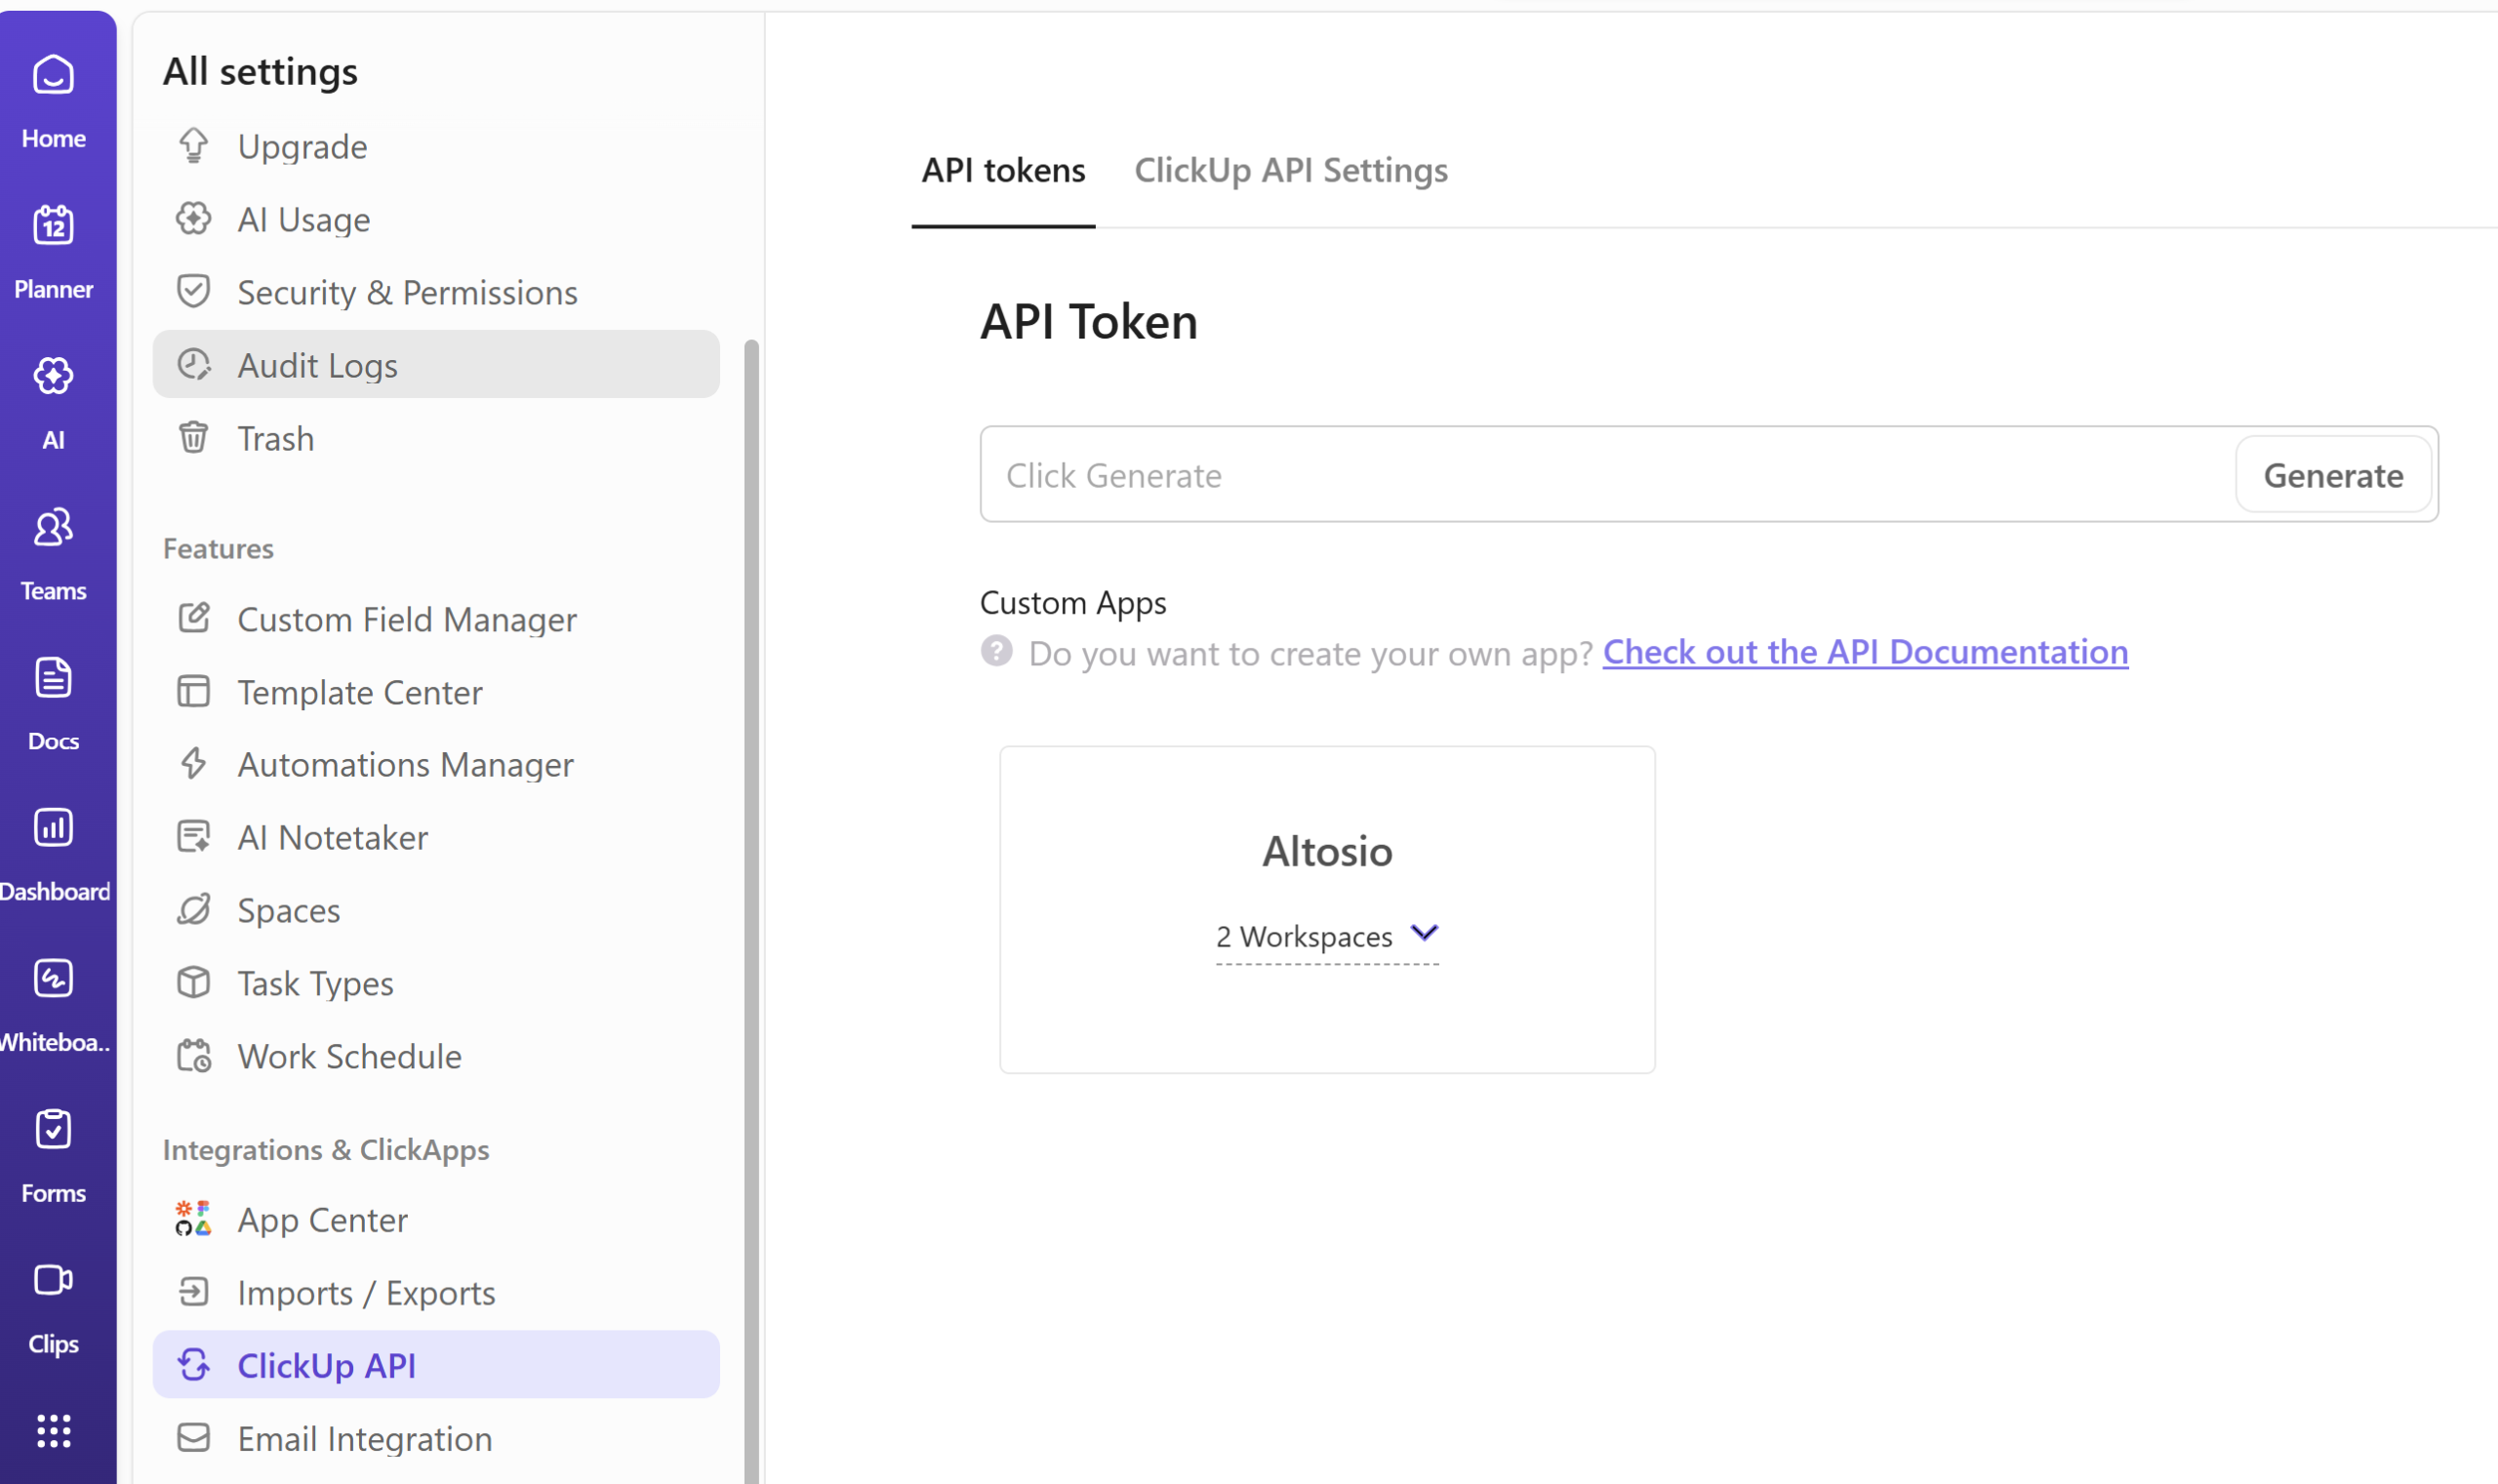
Delete the Altosio App from ClickUp
- Login to ClickUp app.
- Go to settings then ClickUp API on the left-hand side menu, as shown in the screenshot below.
- Delete the Altosio application.
Support
Support is done by email at support@altosio.com or over Teams calls.
Need Help?
- Altosio support team will assist you throughout your migration project and will be pleased to help you run a successful migration.